Whether you’re a novice just starting out or someone with some sewing skills under your belt, I’m here to provide you with a brief overview of my suggested tools and notions that will help you make your sewing a more successful and enjoyable sewing journey.
In this comprehensive guide, I’ll highlight the different areas of the sewing process including sewing tools, pattern drafting & adjustment, cutting, pressing, organization, and resources, empowering you to create a well-equipped sewing toolkit and a dream sewing space that inspires your creativity. So, grab your favorite beverage, settle into your comfiest chair, and let’s dive into the fascinating world of sewing! Photos coming soon. Also of note: I’m not currently an Amazon Affiliate, thus I don’t receive a commission on any Amazon links below.
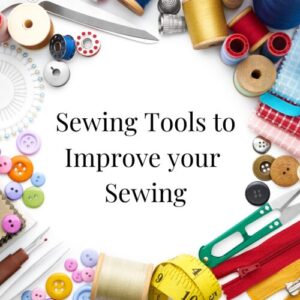
Basic Sewing Tools: Building Your Foundation
When it comes to sewing, having the right tools is essential. Let’s start by focusing on the basic hand-sewing tools that form the foundation of any sewing project. These tools include needles, pins, seam rippers, and scissors. Let’s explore each of these tools and their significance in detail.
Get my Basic Sewing Basket checklist HERE
Needles: Different types and sizes of needles serve various purposes in sewing. You’ll encounter sharps, quilting needles, and embroidery needles, each designed for specific techniques and fabrics.
Hand needles are a much simpler design. A hand sewing needle has an “eye” at one end with a point at the opposite end. The length of a hand will vary between type and size. Typically, a larger needle is longer than a smaller needle. The size and shape of the “eye” will also vary between types.
Just like machine needles, the success of your project depends on selecting the correct needle for the fabric, the thread and the type of hand sewing.” excerpt from Hand Sewing Needles – Sew Which Needle Part 2 by Rocky Mountain Sewing.
“The sizing numbers in hand sewing needles differ from machine needles. Just like machine needles, the size indicates the diameter of the needle. However, on hand needles, the larger the number means the SMALLER the needle. NOTE: This is the opposite of machine needles! So a size 12 hand needle is smaller than a size 5 hand needle.
Common Needle Types: Hand sewing needles are small, slender tools used for sewing fabrics and other materials by hand. They come in various shapes and sizes, each designed for specific sewing tasks. Here are some common types of hand sewing needles:
- Sharps: These needles have a fine, slender shaft with a sharp point, making them suitable for general sewing on lightweight and medium-weight fabrics.
- Quilting Needles: Quilting needles, also known as betweens, are shorter and thicker needles used for quilting and stitching through multiple fabric layers.
- Betweens: Similar to quilting needles, betweens are shorter and thicker needles designed for quilting and sewing through layers of fabric.
- Ballpoint Needles: Ballpoint needles have a rounded tip, making them ideal for sewing knit and stretch fabrics, as they prevent snagging and damage to the fabric.
- Cotton Darners: Cotton darners have a long, thick, and sharp body, used for repairing holes and mending woven fabrics, especially cotton.
- Embroidery/Crewel Needles: These needles have a larger eye and a sharp point, suitable for decorative stitching and embroidery work.
Less Common/Specialty Needles: This category includes various specialized needles like sashiko needles for the Japanese embroidery technique, chenille needles for textured stitches, milliners needles for hat-making, leather needles for sewing leather and heavy fabrics, beading needles for working with beads and sequins, upholstery needles for heavy-duty sewing tasks, and doll needles for sewing dolls and soft toys.
- Tapestry Needles: Tapestry needles have a large eye and a blunt tip, making them ideal for sewing with thicker threads, yarn, or embroidery floss on fabrics like canvas or cross-stitch projects.
- Chenille Needles: Chenille needles are thick and sharp with a large eye, designed for creating textured stitches and embroidery.
- Milliners Needles: Milliners needles have a round eye and are extra-long, making them suitable for making pleats, creating decorative stitches, and working with bonnet-making.
- Leather Needles: Leather needles are heavy-duty needles with a triangular point, used for sewing leather, suede, and other heavy materials.
- Beading Needles: Beading needles are very thin and flexible, allowing them to pass through small beads and sequins easily.
- Upholstery Needles: Upholstery needles are heavy-duty needles with a curved or straight shape, used for sewing upholstery projects and other heavy fabrics.
- Doll Needles: Doll needles are long, thin needles used for sewing dolls and soft toys, where standard needles may not reach certain areas.
Each type of needle serves a specific purpose, and using the right needle for your sewing project can make a significant difference in the results achieved.
Pins: Pins are your best friends when it comes to holding fabric pieces together during sewing. We’ll discuss the different types of pins available, including straight pins, glass-head pins, and quilting pins.
- All-Purpose Dressmaker Pins (Most Common): These are the standard, versatile sewing pins used for various sewing projects. They typically have a slender metal shaft with a rounded ball head for easy insertion and removal. Dressmaker pins are suitable for most fabrics and general sewing tasks.
- Glass Head Pins: These pins have a glass head instead of a traditional metal head. The glass heads are heat-resistant, making them safe to use with an iron without melting or damaging the fabric. Glass head pins are easy to see and handle.
- Plastic Novelty Pins: Novelty pins come in various fun shapes, colors, and designs, making them ideal for decorative purposes. They are not meant for heavy-duty sewing but can add a touch of whimsy to crafts and light sewing projects.
- Silk Pins: Silk pins are very fine and extra-long pins designed for delicate and lightweight fabrics like silk. Their slender shaft helps prevent snags and visible holes in delicate materials.
- Ballpoint Pins: These pins have a rounded, ball-shaped tip, which makes them suitable for knit and stretch fabrics. The rounded tip reduces the risk of damaging the fabric fibers while pinning.
- Quilting Pins: Quilting pins are longer and slightly thicker than regular pins, making them suitable for holding multiple layers of fabric together during quilting projects.
- Short (Applique/Sequin) Pins: Short pins are specifically designed for appliqué work and attaching sequins. Their shorter length helps keep small appliqué pieces in place without interfering with the sewing process.
- Safety Pins: Safety pins are not conventional sewing pins, but they are used for temporary hold or fastening. They come in various sizes and are useful for basting, fitting, or securing layers of fabric.
Each type of sewing pin serves specific purposes and is tailored to work well with certain fabrics or sewing techniques. Using the right pin for the task at hand can improve the accuracy and ease of your sewing projects.
Pin Cushions: Pincushions are small, often cushioned objects used to store and organize pins and needles for sewing or other needlework projects. They come in various shapes, sizes, and materials to suit different preferences and needs. Here are descriptions of different types of pincushions:
- Traditional Pincushion: This is the classic style of pincushion, typically round or square in shape with a cushioned top. It is usually filled with fiberfill or sawdust to create a soft surface for pins to be inserted into.
- Tomato Pincushion: The tomato pincushion is a popular and recognizable style. It is often round in shape, resembling a tomato, with a small attached strawberry-shaped pin cushion on top. The strawberry serves as a handy storage space for needles.
- Magnetic Pincushion: Magnetic pincushions have a magnetic surface on top that attracts and holds metal pins securely in place. This type of pincushion eliminates the need for sticking pins into a cushioned surface and allows for quick and easy retrieval of pins.
- Wrist Pincushion: As the name suggests, a wrist pincushion is designed to be worn around the wrist like a bracelet. It usually has an adjustable strap or elastic band to secure it comfortably on the wrist, providing easy access to pins during sewing or crafting.
Thimbles: A thimble is a protective tool worn on the finger while sewing to prevent needle pricks and provide support when pushing the needle through fabric. Thimbles are typically made of metal, plastic, or leather and come in various sizes to fit different fingers. Here are some common types of thimbles:
- Metal Thimble: This is the most traditional type of thimble, usually made of metal such as steel, brass, or silver. Metal thimbles are durable and offer good protection, making them suitable for heavy-duty sewing tasks.
- Leather Thimble: Leather thimbles are crafted from soft and pliable leather, providing a comfortable fit for the finger. They are often used for tasks involving thicker materials or when a more flexible thimble is required.
- Plastic Thimble: Plastic thimbles are lightweight and budget-friendly. They offer moderate protection and are commonly used for light sewing projects or as a beginner’s thimble.
- Tailor’s Thimble: Tailor’s thimbles are open-ended, meaning they have an opening at the top. They are designed for pushing needles through fabric using the side of the finger, rather than the fingertip. This type of thimble allows for more control and precision.
- Quilter’s Thimble: Quilter’s thimbles are often made of soft materials like silicone or rubber. They are designed to be worn on the middle finger and are commonly used in quilting, where frequent needle pushing is required.
- Adjustable Thimble: An adjustable thimble has a movable ring or mechanism that allows it to be resized to fit various finger sizes. This type of thimble is versatile and can be easily adjusted for a comfortable fit.
Thimbles are essential tools for hand sewing and quilting, providing protection for your fingers and making the sewing process more efficient and enjoyable. The choice of thimble depends on personal preference, the type of sewing project, and the level of protection required.
Seam Rippers: Mistakes happen, even to the most experienced sewists. A seam ripper is an invaluable tool for undoing stitches without damaging the fabric. We’ll explore the various types of seam rippers and discuss their features and uses, so you can confidently correct any sewing mishaps.
- Small seam ripper: Compact and precise, used for delicate fabrics and detailed work.
- Large seam ripper: More robust, suitable for heavy-duty tasks and thick fabrics.
- Ergonomic seam ripper: Designed for user comfort with an ergonomic handle for reduced fatigue.
- Surgical: Traditionally specialized for medical settings, used for precise stitch removal in surgeries. Co-Opted for use in quick removal of stitched seams
Scissors: Cutting fabric accurately is vital for clean edges and smooth sewing. We’ll explore the different types of scissors used in sewing, including dressmaker’s shears, embroidery scissors, and thread snips. I’ll share tips on choosing the right scissors for your projects and provide guidance on their maintenance to ensure longevity and optimal performance.
- 8” Dressmaker shears
- 5” Sewing Scissors
- Embroidery Scissors
- Thread snips
- Paper scissors
Beyond the Sewing Basket: Sewing Room Tools & Equipment
Measuring and Marking Tools:
Accurate measurements and markings are the key to well-fitted garments and precise sewing. Let’s discuss the tools that will help you achieve precise measurements and markings, setting the foundation for successful sewing projects. Measuring Tapes: A reliable measuring tape is a sewist’s best friend. We’ll explore the different types of measuring tapes available, including flexible and retractable options, and I’ll provide tips on using them effectively to take accurate measurements.
- Flexible Tape Measure
- Flexible Curve Ruler
Rulers: Rulers are indispensable for patternmaking, measuring small distances, and drawing straight lines. We’ll discuss various types of rulers used in sewing, such as clear acrylic rulers, L-shaped rulers, and curved rulers, and I’ll explain how each one can enhance your sewing accuracy.
- Seam Gauge
- Yardstick
- Clear Flexible Ruler
- Flexible Curve Ruler (yes, it’s different than the clear flexible ruler)
- 6’x22” quilting ruler
Tailor’s Chalk and Fabric Markers: These tools allow you to mark fabric for pattern alterations, darts, and other design elements. We’ll delve into the world of tailor’s chalk, fabric markers, and disappearing ink pens, discussing their pros, cons, and best practices for marking fabric without leaving any permanent traces.
- Carbon paper & tracing wheel
- Chalk pencil/pen
- Tailor’s chalk
- Tailor’s wax
- Tailor’s tacks
- Air Soluble marking pen
- Water Soluble marking pen
- Frixon marking pen
Cutting Tools
Cutting fabric accurately is vital for clean edges and smooth sewing. Let’s explore the different types of cutting tools available, ensuring you choose the right tools for your projects and achieve professional-looking results.
Dressmaker’s Shears: A high-quality pair of dressmaker’s shears is a must-have for cutting fabric. We’ll discuss the features to look for when selecting shears and provide tips on using them to achieve precise cuts while preserving the fabric’s integrity.
Owning dressmaking shears and scissors is like owning shoes, you need will need different pairs for different jobs.
As a bare minimum aim to have a pair of each of the following in your sewing tool kit. Save up and buy quality and you will only need to buy them once.
- Fabric shears (at least 8 inch / 20cm) I own and love my 9” Gingher
- Small scissors and snips- I own a 5” pair of Ginger Scissors for precise, detail work. Snips are handy for cutting threads at your machine, at the ironing board or for working on handsewing
- Fabric Scissors Professional 10 inch Heavy Duty Scissors
- Paper sicssors (a cheap pair of fabric shears are best, not a cheap pair of tiny craft scissors!)
As you start to do more sewing, you will find these useful so invest in them as and when you can (or stick them on your Christmas list!), but again, quality only and they’ll last you a lifetime of sewing…..
- Pinking Shears
- Appliqué scissors
- Buttonhole scissors
- Fabric Scissors Professional 10 inch Heavy Duty Scissor
Rotary Cutters: Rotary cutters offer an alternative to traditional shears, providing speed and accuracy. However, I’m not a fan of using rotary cutters for garment making until you have had practice using them with quilting (personally, I only use them for crafting & quilting). There is far too great a chance of cutting errors with fabric and personal injury to fingers without the guide of a ruler.
Once you have experience with a rotary cutter, understand the benefits and drawbacks of using one, then feel free to proceed with caution and your best judgement when cutting out garments.
3 types of Rotary Cutters:
- ‘Angular’ rotary cutter
- Ergonomic rotary cutter
- Electric rotary cutter
What size blade to use for your project:
- Larger blade (45 or 60 mm) cuts through more layers or thicker fabric
- General blade (28 mm) is a good all rounder for fabric cutting
- Smaller blade (18 mm) better for more precise and detailed work
Cutting Mats: To protect your work surface and ensure accurate cuts, a cutting mat is essential. I recommend this tutorial for more indepth view of each of the points below atTutorial: How to Choose the Best Cutting Mat for Quilting
- Determine the size of your available space
- Choose a self-healing mat
- Check thickness (minimum of 3 ply)
- Double sided
- Check for non-slip
- Marking & Measurements
- Eco-friendly and scent free
- Pick your color
Pressing Tools & Equipment
A well-pressed garment can make a world of difference in the final outcome. Let’s explore the importance of pressing tools and equipment, ensuring you have everything you need to achieve professional-looking finishes
Iron: A quality iron is a crucial tool for pressing fabric, eliminating wrinkles, and creating crisp seams.
Ironing Board: A sturdy ironing board provides a stable surface for pressing your garments. There are several different types of ironing boards to choose from, including portable and wall-mounted options.
Tailor’s Ham: A tailor’s ham is a pressing tool used for shaping and pressing curved areas, such as darts and princess seams.
Seam Roll: A seam roll is another essential pressing tool that helps you press open seams, especially on small or curved areas.
Sleeve Board: A sleeve board allows you to press sleeves and other small areas with precision.
Press Cloths: Press cloths protect your fabric from direct contact with the iron, preventing shine, scorch marks, or other heat-related damage.
Recommended Books for Aspiring Sewists
For those eager to improve their sewing skills, I’ll suggest a selection of must-have sewing reference books. These books cover a range of topics, including sewing techniques, pattern adjustment, and patternmaking. By adding these books to your collection, you’ll have valuable resources at your fingertips to expand your knowledge and enhance your sewing expertise.
Technique Reference Books: These books provide detailed instructions and illustrations on a wide range of sewing techniques. From basic stitches to advanced construction methods, they’ll help you refine your skills and tackle complex projects with confidence.
- Reader’s Digest Complete Guide to Sewing: Step by step techniques for making clothes and home accessories
- Singer: The Complete Photo Guide to Sewing, 3rd Edition
- All New Fabric Savvy: How to Choose & Use Fabrics
- The Sewing Book: Over 300 Step-by-Step Techniques
Pattern Adjustment and Fitting Books: Not all sewing patterns fit perfectly out of the envelope, so understanding pattern adjustments is crucial for achieving a tailored fit. I’ll recommend books that guide you through the process of making pattern alterations to suit your unique measurements and preferences.
- The Palmer Pletsch Complete Guide to Fitting: Sew Great Clothes for Every Body. Fit Any Fashion Pattern (Sewing for Real People series)
- Ahead of the Curve: Learn to Fit and Sew Amazing Clothes for Your Curves
Patternmaking Books: If you’re interested in creating your own patterns or modifying existing ones, patternmaking books are an invaluable resource. I’ll suggest books that cover the fundamentals of pattern drafting, providing you with the knowledge and skills to unleash your creativity and design garments from scratch.
- Dress Design With Debby Black: A step-by-step guide to modern pattern drafting
- The Pattern Making Primer: All You Need to Know About Designing, Adapting, and Customizing Sewing Patterns
- Patternmaking for Fashion Design by Helen Joseph Armstrong (Hardcover)
- Draping: The Complete Course: Second Edition by Karolyn Kiisel
Inspirational Sewing Books: Sometimes, we all need a dose of inspiration to ignite our creativity. I’ll recommend a selection of inspirational sewing books that showcase beautiful garments, innovative designs, and the artistic side of sewing. These books will spark your imagination and motivate you to explore new techniques and push the boundaries of your sewing practice.
Pattern Adjustment & Drafting Tools: Customizing Your Creations
Not all bodies are the same, and not all sewing patterns cater to individual variations. That’s why understanding pattern adjustments is crucial for achieving a customized fit. Using the books listed above and using the tools and supplies listed below will give you everything you need to get started with pattern adjustments and begin drafting your own pattern designs.
General supplies:
- Working surface: A table with required height between 30”-35.5”
- Pencils: use hard pencils 3H and 4H, colored pencils red & blue
- Hi polymer erasers
- 3M Magic tape
- Pattern Notcher
- Pattern Hole Punch
- Pattern Hangers
Pattern Drafting Paper: When it comes to pattern adjustments and drafting, having the right paper is crucial. We’ll discuss different types of pattern drafting paper, such as Swedish tracing paper, gridded paper, and plain muslin (for draping and pattern testing).
- Medical Pattern Paper
- Grided paper
- Swedish Tacing Paper
- Oak Tag Paper
Pattern Drafting Tools: To make accurate pattern adjustments, you’ll need a set of reliable tools. A collection of tools such as curved rulers, French curves, and hip curves, will assist in drawing smooth lines and modifying pattern pieces to fit your body shape.
- Clear Flexible Ruler
- Metal Ruler
- Metal Hip Curve
- Vary Form Curve
- L-Square: plastic or metal
Measuring Tools for Pattern Adjustments: Taking accurate measurements is the first step in customizing patterns. Specialized measuring tools like the flexible curve ruler, measuring gauges, and body measuring tapes, which aid in capturing precise body measurements for pattern adjustments.
- Clear Flexible Ruler
- Flexible Tape Measure
- Flexible Curve
Tracing and Marking Tools: Tracing and marking pattern adjustments is essential to preserve the original pattern and communicate your modifications. Tools such as tracing wheels, carbon paper, pattern notcher, and are effective in transferring adjustments to your patterns.
- Sharp Prong Tracing Wheel
- Blunt Prong Tracing Wheel
- Carbon Paper
- Pattern Notcher
- Awl
Sewing Machine Parts & Accessories: Enhancing Your Sewing Experience
Understanding the anatomy of a sewing machine and its essential parts is crucial for troubleshooting, maintenance, and optimizing your sewing experience. Let’s explore the significant components of a sewing machine and the accessories that can enhance your sewing capabilities.
Sewing Machine Needles: Sewing machine needles are essential tools used in sewing machines to create stitches in fabrics. They consist of a slender, pointed metal shaft with a flattened side and a small eye through which the thread passes. The needle is attached to the sewing machine’s needle bar, and it moves up and down to penetrate the fabric, forming stitches.
The size of sewing machine needles is denoted by two numbers. The first number represents the needle’s European metric size (NM) and the second number indicates the American size (e.g., 80/12). The larger the number, the larger the needle’s size. The two main factors to consider when choosing the right needle size are the fabric type and thread weight.
Different sewing machine needle types and their common uses include:
- Universal Needle: This is an all-purpose needle suitable for various fabrics, such as cotton, polyester, and blends.Ballpoint Needle: Ideal for knit and stretch fabrics as the rounded tip prevents snagging and damaging the fabric.
- Sharp/Microtex Needle: For precise stitching on delicate and tightly woven fabrics like silk and microfiber.
- Denim/Jeans Needle: Designed for sewing heavy fabrics like denim, canvas, and upholstery materials.
- Quilting Needle: Features a tapered point for stitching through multiple fabric layers found in quilting projects.
- Embroidery Needle: Used for decorative stitching and embroidery on various fabrics.
- Leather Needle: Suitable for sewing leather, suede, and vinyl materials.
- Metallic Needle: Specifically designed for sewing with metallic and decorative threads.
Choosing the right needle size and type is essential to ensure smooth and accurate sewing results. Using the wrong needle may cause fabric damage, skipped stitches, or thread breakage. It’s always a good practice to refer to the sewing machine manual and the needle manufacturer’s recommendations for specific projects.
Bobbin Systems: There are 2 main bobbin systems in modern sewing machines: front-loading and top-loading (drop-in) bobbins. Knowing which one you have and how to wind the thread through the external bobbin case for front-loading machine or internal bobbin case in top-loading (drop-in) will prevent poor stitches when sewing.
You will also need extra bobbins for your sewing machine. Refer to your sewing machine manual for the proper bobbin for your machine. Some are brand specific like Bernina, or size specific class 15 or class 66 in metal or plastic.
Presser Feet: Presser feet are versatile accessories that expand your sewing capabilities and help you achieve professional finishes and tackle various sewing techniques.l
- Standard Presser Foot
- Satin Stich Presser Foot
- Zipper Foot
- Buttonhole Foot
- Blindhem Foot
Specialty Presser Feet: Beyond the standard presser feet, there is a range of specialty feet that can enhance specific sewing tasks. Whether you’re working with challenging fabrics or engaging in decorative stitching, these specialty feet will become valuable assets in your sewing toolkit.
- ¼” quilting foot
- Walking Foot
- Edge Stitching Foot
- Overcast foot
Sewing Room & Organization: Creating Your Dream Sewing Space
If you’re fortunate enough to have a dedicated sewing space, taking the time to research the best storage solutions to ergonomic setups, you can optimize your sewing room for maximum efficiency and creativity. Designing Your Sewing Space: Setting up and designing your sewing space is dependent on the person, their tastes, and how they function best while sewing.
There are also several other considerations when it comes to designing your sewing space, such as lighting, ventilation, and the layout of your equipment and workstations.
Storage Solutions: Keeping your sewing supplies organized is essential for easy access and maintaining a clutter-free workspace. Explore storage options for fabrics, threads, patterns, and notions, including shelves, bins, baskets, and specialized storage systems.
Thread Organization: Organizing your threads not only keeps them tangle-free but also allows you to easily find the colors you need for your projects. There are multiple options for thread storage solutions, such as thread racks, drawers, and thread boxes. What you choose will depend upon available space on walls, shelves, and drawers.
Ergonomic Sewing Station: Sewing can be physically demanding, so it’s crucial to set up an ergonomic sewing station that promotes comfort and reduces strain. Research and explore ergonomics of sewing chairs, sewing machine height, cutting table height for your height and the importance of proper posture.
In conclusion, investing in quality sewing tools and creating an organized sewing space are essential steps toward achieving better results and enjoying a satisfying sewing experience. By building a well-equipped sewing toolkit and optimizing your sewing room, you’ll set the stage for successful projects and endless creativity. Start with the basics and gradually expand your collection as your skills progress. Embrace the joy and fulfillment that sewing brings as you explore new techniques, create beautiful garments, and unleash your creativity in your well-organized sewing space. Happy sewing and creating!
Leave a Reply